Upgrading Your AnyDB Service Plan
This guide provides a comprehensive, step-by-step walkthrough on how to upgrade your AnyDB service. By upgrading, you can unlock enhanced features, increase the number of users on your team, expand your data storage capacity, and gain access to advanced support options, allowing you to further scale your business operations with AnyDB. Let's begin!
Explore Premium Features and Pricing:
To compare the full feature sets and pricing details of our various premium plans, please visit our dedicated pricing page. This will help you choose the plan that best suits your needs.
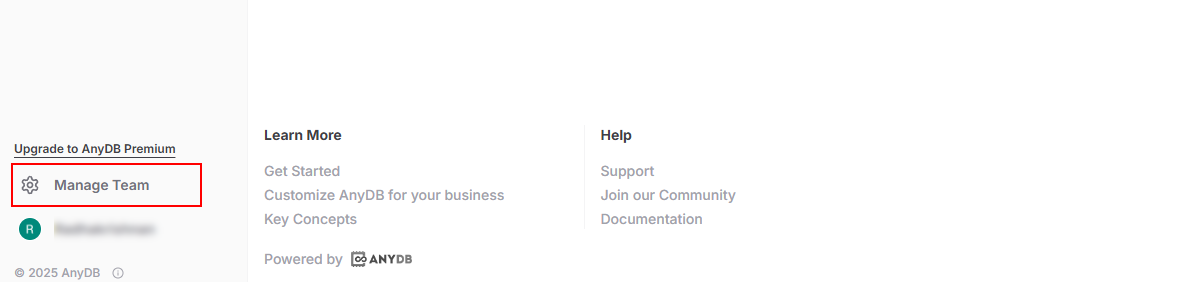
Step 1: Access the Manage Team Dialog
Your current billing information and available upgrade options are conveniently located within the Manage Team Dialog. To open this dialog:
- Navigate to the main AnyDB user interface.
- Look for the
Manage Teamoption, typically found in the bottom-left corner of the screen. - Click on the
Manage Teambutton to open the dialog.
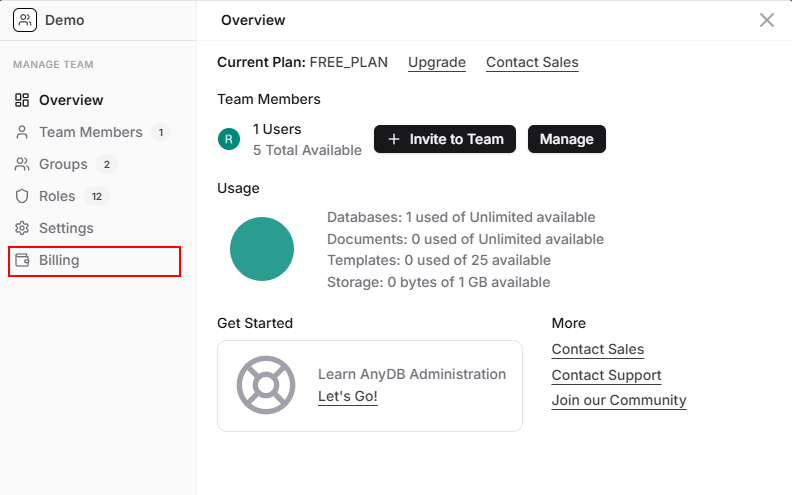
Step 2: Navigate to the Billing Section
Once the Manage Team Dialog is open:
- On the left-side navigation menu within the dialog, locate the
Billingoption. - Click on
Billingto access your current billing details and upgrade options.
Step 3: Understanding Your Billing Options
The Billing screen provides a clear overview of your current subscription and available upgrade paths. The following table explains the various fields and options you'll see:
| Field No. | Field | Details |
|---|---|---|
| 1 | Pay Monthly | Pay for subscription monthly. |
| 2 | Pay Annually | Pay for subscription yearly. |
| 3 | Available Plans | This section displays available plans and current selected plan. Also, plans eligible for upgrade will have an upgrade button. |
| 4 | Current Plan | The plan that currently the team is subscribed to. Upon signup, every team is subscribed to free plan automatically, until it is upgraded. |
| 5 | Seats | Number of users allowed to be part of the team. |
| 6 | Current Billing | Shows the current billing frequency ie., Month or Year. |
| 7 | Next Billing Date | Current subscription end date. |
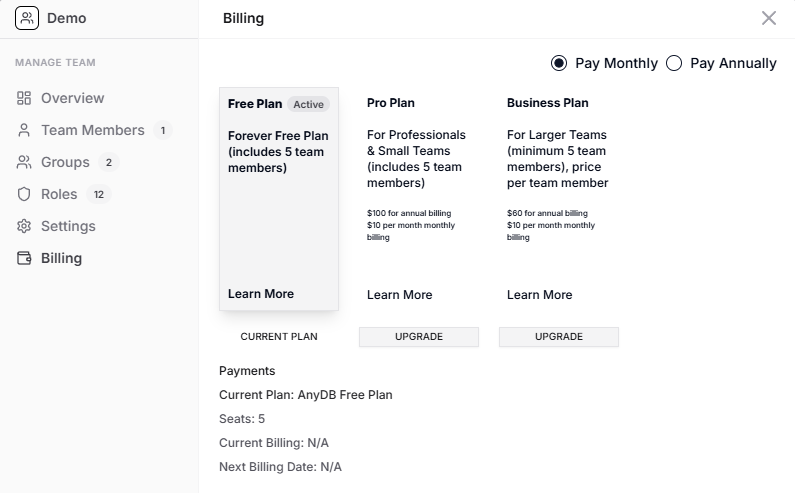
Step 4: Select Your Upgrade Plan
Once you are on the Billing screen, the Available Plans section will display a list of upgrade options.
- Review the available plans, paying attention to the features and limits offered by each.
- For the plan you wish to upgrade to, select your preferred billing frequency:
- Pay Monthly: Choose this option to be billed on a monthly basis.
- Pay Annually: Choose this option to be billed once per year, often with a discounted rate.
- Click the
UPGRADEbutton located below the plan you have selected and the chosen billing frequency. This action will typically open a checkout dialog or redirect you to a payment processing page.
Step 5: Complete Checkout
On the checkout screen or payment processing page:
- Carefully review the details of your selected upgrade plan and the total amount due, including any applicable taxes.
- Enter your payment information. AnyDB supports the following secure payment methods currently:
- Credit Card (Visa, Mastercard, American Express)
- Provide your billing address as required.
- Click the
Subscribebutton to finalize your upgrade.
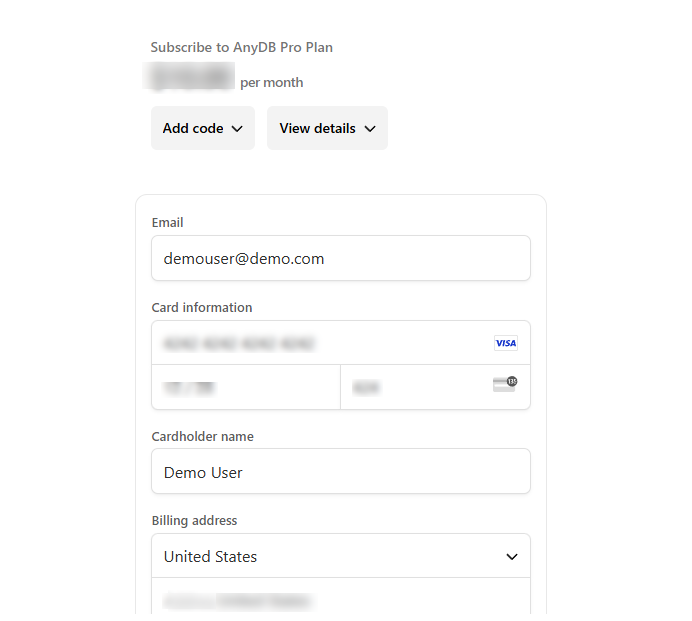
Upon successful completion of the payment, your AnyDB service plan should be upgraded immediately, and the updated features and limits will be reflected in your account.
Tax Information:
Please be aware that any applicable sales taxes will be automatically calculated and added to your invoice based on the billing address you provide. The final amount displayed during checkout will include these taxes.
If you encounter any issues during the upgrade process or have any questions regarding billing, please do not hesitate to reach out to our dedicated customer support team for further assistance. You can find our contact information here.